How to Cook Bacon in the Oven
Bake bacon at 400 degrees on a lined sheet pan for crispy, evenly cooked strips without flipping, then get the hot grease out of the oven and into the trash safely.

You will end up with a full pan of evenly cooked bacon, crisp or chewy as you like, without flipping a single strip. Lay the strips on a sheet pan, slide it into a 400-degree oven, and check them when the timer goes off. They cook side by side in the same heat, so they finish much closer together than they do in a crowded skillet, and there is no skillet spitting grease at you.
The oven also handles large batches. A half sheet pan holds 12 to 16 strips at once, so you can cook for a crowd without doing it in shifts.
The one thing the oven adds is a pan of hot liquid fat, so steps 4 and 5 show you how to get it out of the oven and throw it away safely.
A rimmed baking sheet (also called a sheet pan or half sheet pan). Aluminum foil or parchment paper to line it for easy cleanup. An oven-safe wire rack, if you want the crispiest bacon. Check that yours is labeled for oven use before it goes in. If you place the bacon on a rack set inside the sheet pan, the fat drips below and the bacon crisps up on all sides. Paper towels for draining the cooked bacon.
Preheat your oven to 400 degrees
Set your oven to 400 degrees Fahrenheit (200 Celsius). A hot oven renders the fat quickly and crisps the bacon evenly. Preheating matters because the times in step 3 assume the pan goes into an oven that is already at 400. Start in a cold oven and those times no longer apply.
Line a sheet pan and arrange the bacon
Line your rimmed baking sheet with aluminum foil or parchment paper. The rim is not optional. Bacon releases a lot of liquid fat, and a flat cookie sheet lets it run off the edge onto the oven floor, where it smokes and can catch fire. Press foil up over the rim so fat cannot get underneath it, which is what makes cleanup easy. Parchment also works well, and the bacon sticks less to it. Trim it so it sits inside the pan, since Reynolds warns against letting its parchment touch the sides of the oven. If you have a wire rack, place it on top of the lined pan. Lay your bacon strips in a single layer across the pan or rack. The strips can touch at the edges since bacon shrinks as it cooks, but do not overlap them. Overlapping means uneven cooking. A standard half sheet pan fits 12 to 16 strips of regular-cut bacon, depending on how wide they are.
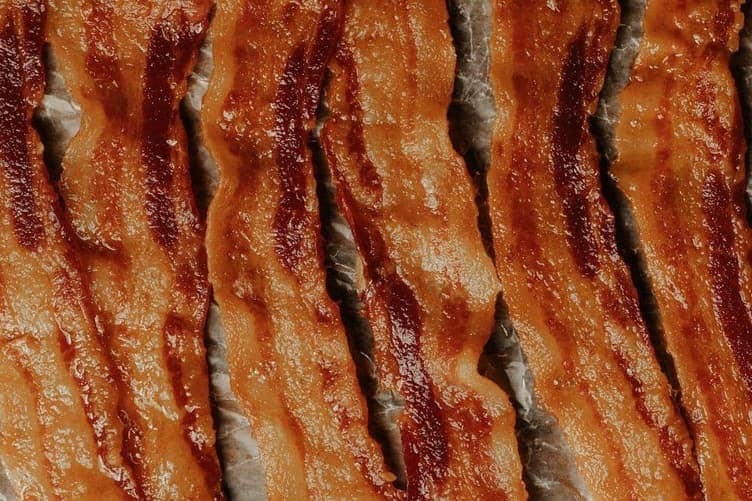
Good to know: Cold bacon is easier to handle and separate. Take it straight from the fridge to the pan. If your strips are stuck together, slide a butter knife between them instead of pulling, which tears the thin ends.
Bake for 15 to 20 minutes
Place the sheet pan in the oven on the center rack. Set a timer for 15 minutes. No flipping needed. You do not have to touch the bacon, but stay in the kitchen while it cooks. The National Fire Protection Association advises checking regularly on food that is baking or roasting, staying in the kitchen, and using a timer. At 15 minutes, check the bacon. Thin-cut bacon may be done. Hormel's package directions give 15 to 20 minutes at 400 degrees for both its regular and its thick-cut bacon on a rack, and Wright gives 18 to 20 minutes for its thick-cut bacon on a foil-lined pan. If your strips need longer than 20 minutes, keep checking every 2 minutes. The bacon will continue to crisp slightly as it cools, so pull it when it looks a shade lighter than your ideal doneness.
Heads up: Ovens vary, and the difference between crispy and burnt can be 2 minutes. Start checking at 15 minutes and check every 2 minutes after that. Bacon goes from done to overdone fast, especially thin-cut strips. If you see flames inside the oven, do not open the door. The NFPA's instruction for an oven fire is to turn off the heat and keep the door closed. If flames escape the oven, the U.S. Fire Administration says to leave your home and call 911.
Drain and serve
Slide the oven rack out and lift the pan with dry oven mitts, keeping it level, because it is holding liquid fat at oven temperature. Set it on the stovetop or another heat-safe surface. Use tongs to transfer the cooked bacon to a plate lined with paper towels. Let it rest for 1 to 2 minutes. The strips firm up as they cool and the paper towels absorb excess grease. If you used a wire rack, most of the fat has already dripped off, so the paper towels are optional. Serve it right away, or turn the oven down to 200 degrees and keep the bacon warm on an oven-safe plate, off the paper towels, while you finish the rest of breakfast. USDA's Food Safety and Inspection Service says food you are not serving right away has to stay at 140 degrees or above, and a 200-degree oven keeps it there.
Deal with the grease
Never pour bacon grease down the drain, even while it is still liquid. It hardens as it cools, and New York City's Department of Sanitation warns that cooking oil and grease can clog pipes and cause sewage backups. To throw it away, do what the department says and let the fat cool, then pour it into a container, seal it, and put it in the trash. If you lined the pan with foil, you can skip the container. Let the fat firm up on the foil, fold the foil into a pouch, and throw that away. If you want to save the grease for cooking, wait until the fat has cooled to warm but is still liquid, then pour it through a fine mesh strainer into a glass jar. Keep the jar covered in the fridge. We could not find a food safety agency that gives a storage time for rendered bacon fat, so throw it out as soon as it smells sour or rancid. Bacon fat is excellent for frying eggs, sauteing vegetables, or adding to baked beans.
If the oven smoked, look for fat that spilled onto the oven floor, wipe it out once the oven is cool, and press the foil up over the rim next time, as step 2 describes. If some strips burned while others stayed soft, they were different thicknesses or overlapped, so keep one thickness per pan and give each strip its own space. If you saved the fat in step 5, use it the next time you roast vegetables or make cornbread. If the oven method has won you over, our guide on how to cook ribs in the oven uses it for a much longer cook.
Questions we get asked about this
Answers from experience, not a textbook.
Use 400 degrees Fahrenheit. It renders the fat quickly and crisps bacon in the 15 to 20 minutes that Hormel and Wright print for 400 degrees. Dropping to 375 cooks thick-cut bacon more gently, but it needs longer. Wright gives 18 to 26 minutes at 375 for its thick-cut bacon. Going hotter shortens the gap between crisp and burnt, which is already only a couple of minutes at 400. Stick with 400 until you know your oven and your preferred doneness.
No. The underside of each strip cooks against the hot pan in its own rendered fat while the top browns in the oven's heat, so both sides crisp without turning. If you use a wire rack, air circulates underneath as well, making the bottom just as crispy as the top. Flipping is a skillet habit that the oven method makes unnecessary.
Yes. Parchment paper works well, and the bacon sticks to it less than foil. Make sure you use actual parchment paper, not wax paper. Reynolds says only its parchment, not its wax paper, is oven safe, and rates the parchment for a conventional oven up to 425 degrees. That puts 400 inside the limit. Other brands set their own limits, so check the box, and keep the paper inside the pan, away from the sides of the oven and the broiler.
Pull the bacon out at the start of the cooking range. Hormel and Wright give a single range at 400 degrees, cooked "to desired crispness", and no separate time for chewy bacon. Check at 15 minutes, as step 3 says, and take out the strips that look cooked through but still bend. Chewy bacon still has to be fully cooked. USDA's Food Safety and Inspection Service says bacon is too thin to check with a thermometer and that bacon cooked crisp should have reached a safe temperature, so never pull a strip that still looks raw anywhere. Thin-cut strips pass from limp to crisp very quickly, so there is almost no window to stop in between.
Yes. A single sheet pan holds 12 to 16 strips. If you need more, use two sheet pans on different oven racks and rotate them halfway through cooking so both pans get even heat. Two pans hold 24 to 32 strips in one batch. Both will be holding hot fat, so move them one at a time, when you rotate them and when you take them out.
Kitchen Basics
How to Cook Rice
How to Boil an Egg
How to Cook Bacon in the Oven
← you’re hereHow to Meal Prep
How to Sharpen a Knife
How to Use Chopsticks
How to Make Simple Syrup
How to Make Gravy